sábado, 30 de noviembre de 2013

Bison Tagliata Recipe

Bison Tagliata
It's Summer and thoughts turn to grilling. Me? I'm in an apartment with no grill, but that doesn't stop me from eating stuff people normally grill like steak. Just as I warmed up to grass fed beef, I'm pretty much head over heals for bison steak and I have a nifty way of cooking it sans grill. It tuns out what we think of as American buffalo is really bison. What's on the buffalo head coin? A bison. There are water buffalo (for that crazy good mozzarella) and the African Cape buffalo (not so sure what they are good for) but American buffalo is really bison so let's go with that.

Bison is much lower in fat than beef, high in iron, slightly lower in cholesterol. Recently I heard Ted Turner speak at the Sustainable Foods Institute, part of the Monterey Bay Aquarium's annual event, Cooking for Solutions. It turns out, he is crazy about bison. He owns the largest herd in the world and has opened a chain of bison restaurants. He loves the romance of the prarie. But the environmental arguments for bison are even stronger. Bison are grazing animals and part of the ecosystem that helps keep grasslands healthy. Because it is so lean, cooking it fairly gently is important so it stays tender and flavorful.

I like a certain Italian way of eating steak called 'tagliata' which just means sliced. Instead of a big hunk of meat you get slices of perfectly cooked medium rare steak over a spicy arugula salad drizzled with extra virgin olive oil, some shavings of Parmesan or Pecorino and a wedge of lemon. Using smoked olive oil is a great way to get the taste of the grill without, you know, a grill. It's expensive but a tiny bit goes a long way, and it doesn't lose pungency if you store it properly (in a cool dark place).

This is a super lazy summertime meal, it requires very little cooking, and it's a one dish meal to boot. My biggest complaint about bison is the difficulty in finding it at the store. Ground bison is getting more common but steaks are much harder to locate. I got samples of bison steaks from High Plains Bison, you can purchase from them online or find more producers at Bison Central.

Bison Tagliata
Serves 4

2 ribeye or strip bison steaks
Arugula
Chunk of Parmesan or Pecorino
1 lemon
Extra virgin olive oil
Salt and freshly ground pepper

Preheat oven to 350 degrees. Heat a heavy cast iron skillet over high heat. Pat the steak dry and season generously with salt and pepper. Sear the steak in the skillet, cooking for 2-3 minutes on each side, until brown. Transfer the skillet to the oven and roast for 5 minutes. Remove from the oven and transfer steak to a cutting board and cover with foil and let stand for 10 minutes.

Arrange arugula on 4 plates, shave cheese using a vegetable peeler and place strips of cheese on the salad. Slice the steak against the grain and lay strips on the salad. Drizzle with a tiny bit of olive oil. Serve with a lemon wedge.

Enjoy!

jueves, 28 de noviembre de 2013

(Not Really) Moroccan Chicken & Lentils Recipe

Not Moroccan Chicken
Hunger ChallengeThis might be my favorite Hunger Challenge recipe. My apologies for it being brown on brown on brown, but trust me, it is delicious. On a bed of earthy and mildly spiced lemony lentils rests sweet roasted onions--some soft and some chewy--and tender roast chicken with crisp skin. It's is a combination of two different Bon Appetit recipes, but modified pretty significantly because I didn't have all the ingredients necessary. The technique for pan roasting the chicken thighs is a good one though I had to adjust it to keep the chicken from overcooking.

Beans and legumes like lentils are a very economical way to stretch a budget and more expensive ingredients such as fresh vegetables and meat or cheese. My chicken thighs were over 6 ounces each, so one per person was plenty, but if you need more for bigger appetites by all means double the number of chicken thighs. I baked this dish in the toaster oven, you may need to cook it a little longer if you use a conventional oven. I'm not sure how Moroccan the original recipe is. My version is undoubtedly even less Moroccan which accounts for he admittedly goofy name.

A few other tips for saving money when it comes to cooking and shopping:

* Canned beans are more than dried beans. Cook things like chicken broth, beans and rice ahead of time and keep them in the refrigerator all week and use them as you need them.

* Look for vegetables that are in season and on sale. Compare the price to frozen vegetables especially for things like spinach and peas.

* Soups and stews like chili are easy ways to save, but you may get tired of eating soft food. Make some crunchy raw salads with carrots or beets to add variety.

* Scour the 'ethnic' food aisles for bargains. Sometimes spices and even staples like rice can be cheaper there.

* Cook double portions and you'll have something to eat on days when you don't have the time to cook.

* Buy in bulk. Instead of buying a jar of spices and bags of dried fruit and nuts, buy just a few teaspoons or tablespoons.

* Price out 'value packs.' The chicken I bought was only 99 cents a pound, but most packages were at least four pounds.

* Utilize ingredients that add flavor, texture and visual appeal to your meals, but don't cost a lot such as fresh cilantro, green onions and toasted bread crumbs.

Not Really Moroccan Chicken & Lentils

$2.09 for 2 servings (double the chicken for bigger appetites)

1/4 lb brown lentils .32
3 cups water
salt

2 chicken thighs, bone in 1.60
1/2 onion, sliced .20

2 Tablespoons olive oil .40
Juice of 1/2 lemon .17
1/2 teaspoon chile powder
1/4 teaspoon cinnamon .05
1 garlic clove, minced .05
Chopped cilantro to garnish .10 (optional)

Preheat toaster oven to 450 degrees. Combine water and 1/4 teaspoon salt in a saucepan over high heat. Add lentils; bring to boil. Cover, reduce heat and simmer until lentils are tender, about 20 minutes. Drain well; rinse with cool water and drain again. In a mixing bowl combine the olive oil, lemon juice, chile powder, cinnamon and garlic. Add the lentils and toss. Season with salt to taste. Make a bed of lentils on each plate that you will serve the chicken on.

Season chicken with salt, pepper. Heat a cast-iron skillet over high heat until hot. Place thighs in dry skillet, skin side down, and cook 2 minutes. Reduce heat to medium; continue cooking until fat renders and skin is golden brown, about 5 minutes. Flip and cook for another 5 minutes. Flip again so skin side is down and tuck sliced onions into the skillet, between the pieces of chicken. Transfer to the oven and cook 12 minutes. Check the skillet occasionally to make sure the onions are not burning and stir as necessary. Flip chicken so skin side is up; continue cooking until skin is crisp and meat is cooked through, about 5 minutes longer. Chicken is done when it reaches the internal temperature of 165 degrees. Remove from the oven. Place onions on the lentil salad and chicken on top of that. Garnish with chopped cilantro.

domingo, 26 de mayo de 2013

Lemon and oregano lamb kebabs recipe

Photo: Lemon and oregano lamb kebabs recipe

The Arabic Food Recipes kitchen (The Home of Delicious Arabic Food Recipes) invites you to try Lemon and oregano lamb kebabs  Recipe. Enjoy the Arabic Cuisine and  learn how to make Lemon and oregano lamb kebabs.

These tasty lamb skewers taste great served with Lebanese bread and a squeeze of lemon.

Preparation Time 20 minutes
Cooking Time 20 minutes

Ingredients (serves 4)

80ml (1/3 cup) fresh lemon juice
2 tbs extra virgin olive oil
1 tbs dried oregano
2 garlic cloves, crushed
1kg lamb leg steaks, cut into 2.5cm pieces
6 ripe tomatoes, coarsely chopped
1 small red onion, cut into thin wedges
1 1/4 cups fresh continental parsley leaves
100g Greek feta, crumbled
Lemon wedges, to serve
Lebanese bread, to serve

Method

Combine the lemon juice, oil, oregano and garlic in a shallow glass or ceramic dish. Thread lamb onto skewers. Add to marinade and turn to coat. Cover and place in fridge for 4 hours to marinate.

Preheat a chargrill on medium-high. Add half the lamb and cook for 4-5 minutes each side for medium or until cooked to your liking. Transfer to a plate and cover with foil to keep warm. Repeat with remaining lamb.

Combine the tomato, onion, parsley and feta in a bowl. Divide among serving plates and top with lamb. Serve with lemon wedges and bread.

Notes

Note: Allow 4 hours marinating time.

Source
Good Taste - October 2006, Page 98
Recipe by Michelle Southan

More Arabic Food Recipes: 

Build-Your-Own Shish Kabobs
Eggplant & couscous salad with yoghurt dressing
Chickpea Fattoush
Lentil & tomato salad with garlic lebanese bread
Lebanese Fattoush Salad with Grilled Chicken
Mediterranean-style bean salad

Save and share Lemon and oregano lamb kebabs recipe

 Want to share this recipe with your family and friends? Click the button below to send them an email or save this to your favorite social network.


domingo, 19 de mayo de 2013

http://feedproxy.google.com/~r/blogspot/sBff/~3/fIDBEVNhKs0/root-vegetable-gratin-notes-from.html

[I hope you enjoyed our first and last Dostoevsky reference] Whenever I see those big piles of rutabagas at the market, I always think to myself, "who the heck is eating all these root vegetables?" 

I understand that there've been times when we literally had no choice – it was either gnaw on a parsnip or perish, but nowadays with so many other delicious choices, why would anyone eat root vegetables on purpose? Has anyone ever stumbled out of a smoky dorm room late at night, in search of a big plate of steamed turnips? Probably not. 

So, while you'll never catch me boiling up a batch of these fugly roots to enjoy their intoxicating sulphurous savoriness, I have been known to tolerate them in the occasional gratin.

Of course, I cheated and added some potatoes to mellow things out, but still, all kidding aside, this is a very delicious and enjoyable way to eat them, and would make a fantastic side dish for the holidays. And yes, I do know that potatoes are tubers and not roots, so save your emails. Enjoy!


Ingredients:
1 turnip
1 rutabaga
1 small celery root
2 yukon gold potatotes
1 parsnip
* root vegetable sizes and shapes vary, but bottom line, you'll need enough to fill a 9 x 13-inch casserole dish up 3/4 of the way
salt to taste (be sure to generously salt the boiling water!)
2 tsp olive oil
2 tbsp butter
3 cloves minced garlic
1 cup cream
pinch of nutmeg
pinch of cayenne
1 tbsp fresh picked thyme leaves
1 1/4 cup chicken broth
1/4 cup finely grated Parmesan cheese, divided

viernes, 17 de mayo de 2013

Great Gazpacho

I had a hankerin' (oh yes I did) for gazpacho now that our weather has turned more summery. I was going to make my usual version with V8, but in the freezer I found a bag of tomatos that I had oven roasted and frozen last fall.

I used this recipe as my inspiration, but I went much simpler.

2 bell peppers (I used one orange and one red) whizzed smooth in the food processor with a few cloves of garlic and a spoon of sugar. I added my thawed tomatos and juice and pureed until smooth. I stirred in a couple of shots of red wine vinegar and some salt, then chilled for an hour.


Serve with a piece of cheesy toast, and a chocolate chip cookie for dessert.

domingo, 14 de abril de 2013

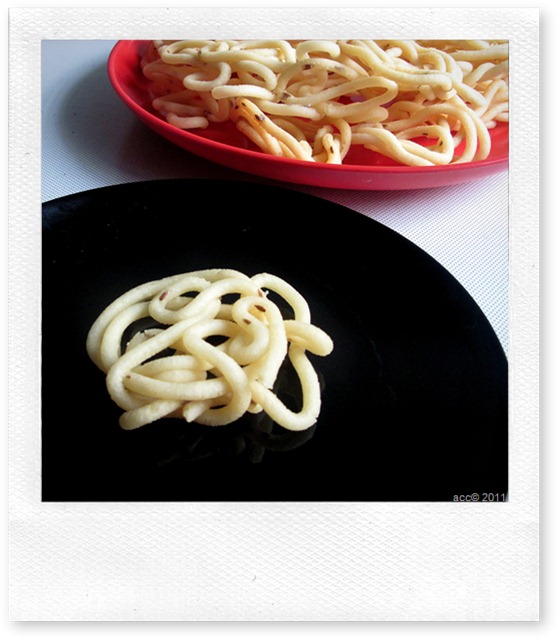
THENKUZHAL | MURUKKU - STEP BY STEP RECIPE


THENKUZHAL

Mostly we all make thenkuzhal for diwali or some special occasions. I love this murukku since my childhood days.I used to do all the pre preparatory works like buying rice and dal , grinding it in flour mill etc..I sit with my mom & paati when they make this for diwali especially for the last batch of murukku .. She makes half cooked murukku( we call it "arai vekkaadu" in tamil) . I love this murukku more than the crispy ones. I eat it hot immediately after taking out from the oil.Even today , my MIL made this specially for me..How sweet !!In love .I saw so many thenkuzhal recipes in web with different proportions of rice and urad dal . I want to share my version.I tried to take step by step pics for beginners. I really admire our fellow bloggers who blog recipes with step by step pics for each and every post. They have so much of patience and skill to do this. I really don't have both Winking smile.For sweets and savouries step by step presentation is most essential i feel. Hope this post helps beginners. Feel free to leave ur comments about my presentation.I will improve in my further posts. Now coming to my version..

INGREDIENTS

  • Raw rice / Maavu arisi – 1 kg or  5 cups
  • Round white urad dal – 3/4 cup
  • Fried gram dal / pottukadalai – 1 handful
  • Butter – 4 tbsp or 100 gms
  • Asafetida / hing – 1/2 tsp
  • Jeera / cumin seeds or Black sesame seeds – 2 tbsp
  • Salt & water – As needed.
  • Cooking oil – for deep frying..

"""PLEASE HAVE A LOOK AT THE "POINTS TO REMEMBER" BEFORE STARTING.."""

METHOD

  1. Heat a kadai and dry roast urad dal slightly without changing its colour. Roast till nice aroma comes from urad dal. Switch off the flame and add the fried gram dal.
  2. Now mix the rice, roasted urad dal and fried gram dal.
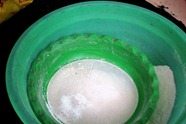
  3. Grind in flour mill or powder it in mixie. If u use mixie to grind the mixture, please don't forget to sieve the flour. Flour should be very fine in texture.

sieve

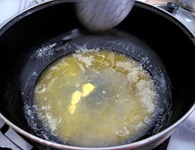
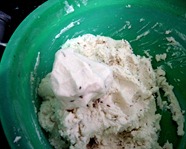
  1. Add salt , melted butter, hing , jeera or sesame seeds and water to make a non sticky dough.

melted buttermurukku dough

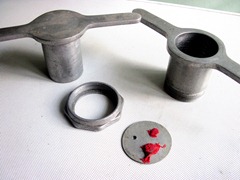
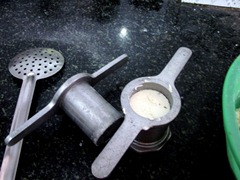
Take the murukku press and mould with one whole.

achudough in achu

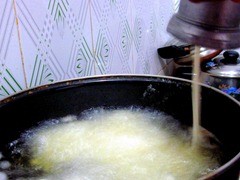
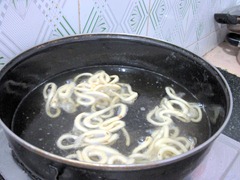
Fill the dough and set aside.Heat the oil in a broad kadai and and press the murukku in circular motion directly in oil or press the murukku in a polythene sheet or in the back of ladle separately and then drop in hot oil. This way u get a nice shape. After u press the murukku , please stand a few feet away from the kadai.Sometimes , very rarely murukku may burst like seedai . If it doesn't burst, then proceed.

pressing murukku

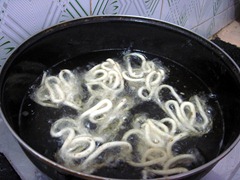
Cook for sometime.Flip and cook for some more time till the hiss sound and bubbles ceases .

Do it in medium flame.Adjust the flame whenever needed.

cookingsound ceased

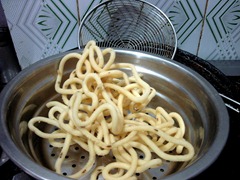
Remove and drain in a paper towel..Store in an air tight container after it cools down.

murukku in colander

Don't forget to try the half cooked murukku in the last batch.

For this after u drop the murukku in oil , just flip immediately and remove in 10 secs.. Eat it hot !!

White colored , crispy thenkuzhal is ready to enjoy !!

COLLAGE

Points to remember

  • When u make murukku in large quantities , make the dough in batches to avoid the dough from drying.Also cover the dough with a damp cloth or a lid while cooking murukku. This helps in getting white colored murukku for all the batches. Otherwise color may vary for the last batches.
  • We have added fried gram dal and butter to get the crispness & white color . But usually fried gram dal is not added in thenkuzhal.Its purely optional.
  • Adding too much of butter makes the murukku look oily and becomes soggy very soon.Shelf life gets reduced.
  • Adding more urad dal flour or too much of roasting the urad dal results in dark colored murukku.So make sure u roast the urad dal without changing the color..
  • If u use store bought rice flour and urad dal flour , the ratio would be 6:1.No need to roast the urad dal flour if it is ready made.
  • The murukku flour should be very fine in texture otherwise it may burst while cooking. So i always sieve the flour for safer side Winking smile
  • Use enough oil for deep frying. Add more oil after few batches if necessary.
  • Drop or press the murukku only when the oil becomes hot. U can find this by dropping a pinch of flour. It raises up quickly.This is the correct heating point. Do not let the oil fume. Always keep the flame in medium for even cooking.
  • Instead of pressing in oil directly , u can try pressing it in the back of ladle greased with oil or greased polythene sheets. This way u'll get nice shape.. 
  • After cooking when u break the murukku , u can c a hole in the middle of the murukku like  funnel. This denotes the murukku is perfect !!

hole in murukku

Can u see the hole  Winking smile. Catch u in my next post. Bye. Have a gr8 weekend Smile